[http://www.nautilus6.org]
This document is also available in text format.
Debian GNU/Linux and NetBSD 1.6.2 on SONY VAIO U50/70
 |
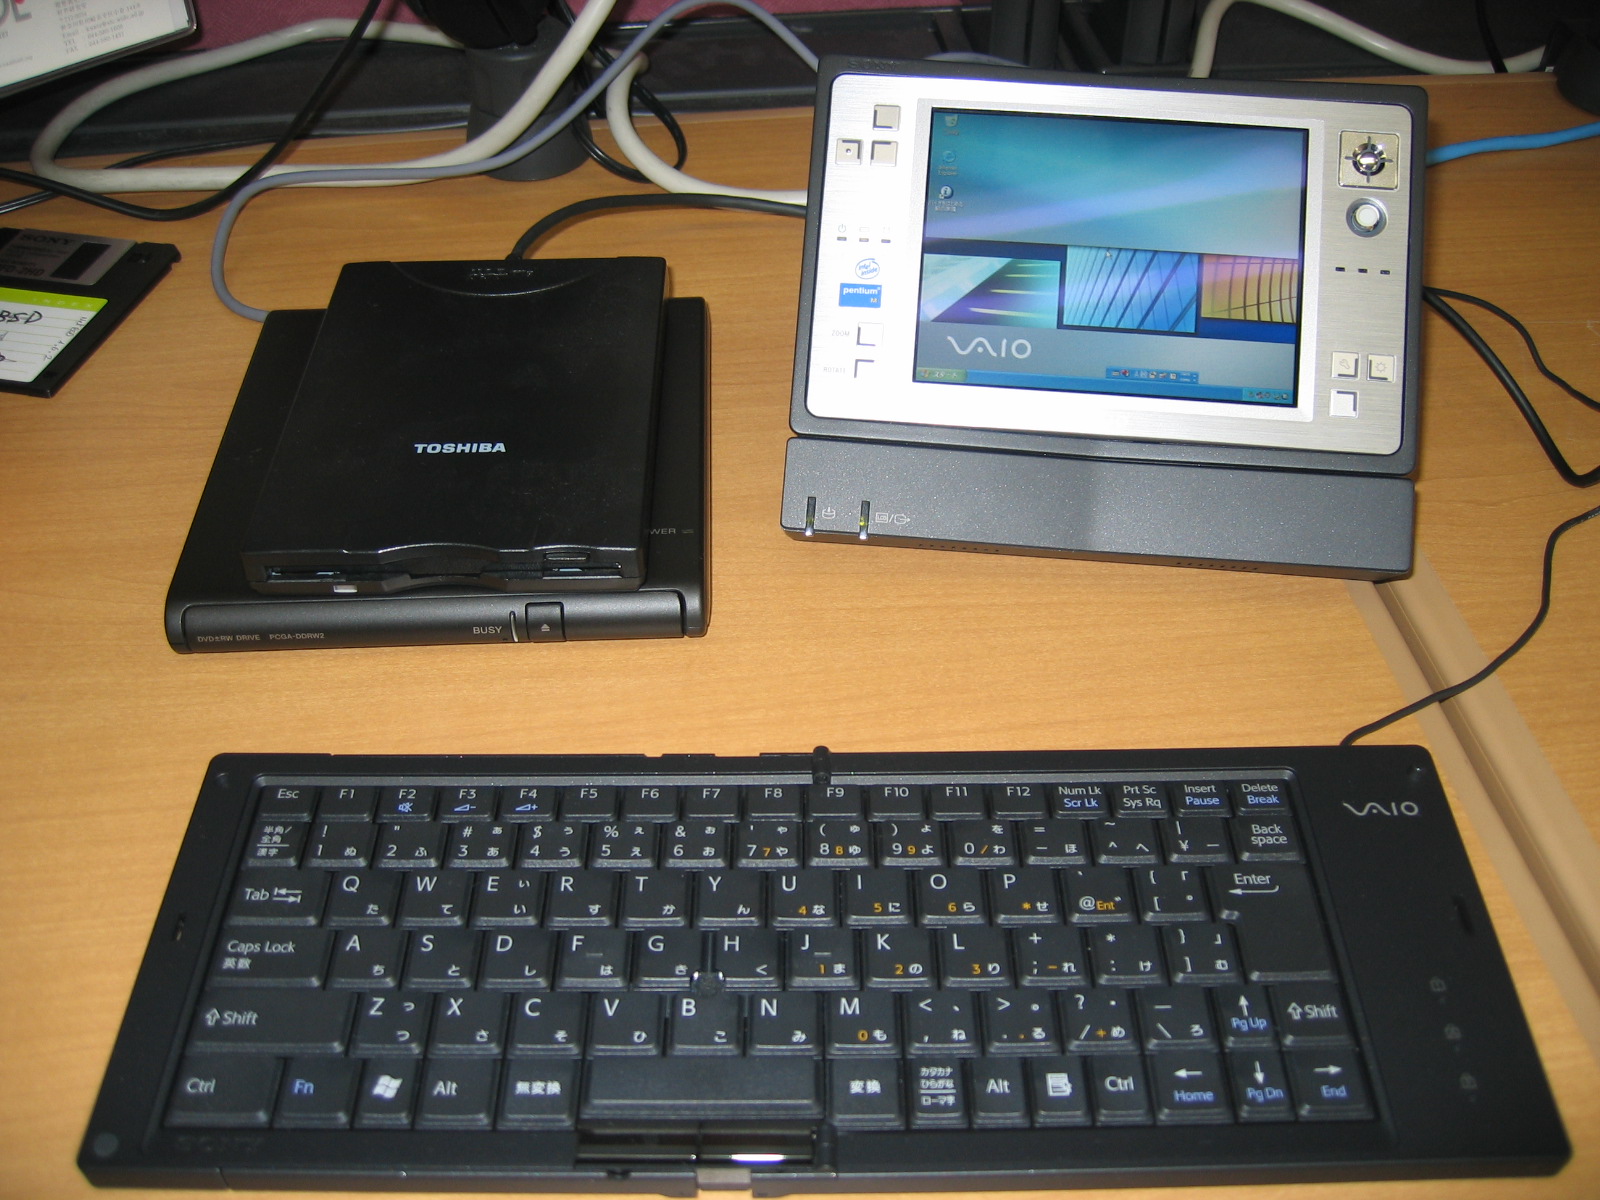
This VAIO is sold with Microsoft Windows XP. This document explains how to install another operating system. We will see here how to install both Debian GNU/Linux and NetBSD 1.6.2 on the SONY VAIO U70. The VAIO has several USB ports, one firewire ports and one ethernet port. I experienced problems installing from a firewire CD-ROM for both Linux and NetBSD. I also had problems with the USB floppy drive with Linux, when swaping the floppies. So for Linux, the network install is the easiest way, unless you have an USB CD-ROM drive. For NetBSD we will use an USB floppy drive. The SONY USB keyboard sold with the VAIO is not recognized by NetBSD, so I advice you to use another USB keyboard, plugged on the craddle of the VAIO.
|
Table of Contents
1. What do you need?
2. Prepare the VAIO hard drive
3. Install NetBSD 1.6.2
4. Install Debian GNU/Linux
5. Picture Gallery
References
Acknowledgement
Contact
1. What do you need?
Of course you need a SONY VAIO U50 or U70. We used the U70 in our tests, but
everything should work fine with the U50 that is almost the same hardware.
You will also need another computer that will act as a server for the network
installation. The VAIO and this computer will have to be connected via the
Internet (the same LAN would be faster for the operations).
To install NetBSD you will also need an USB floppy drive.
Also, get a KNOPPIX, it will be useful:
http://www.knoppix.org/
We used the KNOPPIX 3.3 for our tests, newer versions are also OK.
2. Prepare the VAIO hard drive
I experienced issues with the VAIO USB keyboard during both NetBSD and Linux
installation. So, I advice to use another USB keyboard, plugged on the craddle
of the VAIO. If you only plan to install Linux, you can still use the VAIO
keyboard but you will have to follow these instructions to prepare the VAIO
hard drive, then it will be easy to install the operating system without using
the keyboard. The VAIO USB keyboard issues disappears with Linux once the OS
is installed, but not with NetBSD.
First, we will boot on a KNOPPIX from the network, it will allow us to access
the hard drive.
a. Boot on KNOPPIX from the network
The VAIO U can boot via the network using PXE. We will use such feature to boot
a Knoppix from the Network. You could also use PXE to boot a *BSD over the network,
many documents are available on the Internet about PXE.
Boot on knoppix on one computer connected to the network. We will boot the VAIO from this computer.
Launch the "knoppix-terminalserver" and configure it:
Enable root access on clients
Maybe you will have some issues with dhcp3 config file, you may need to
change the configuration: check the "subnet" option in
/etc/dhcp3/dhcpd.conf
Restart the dhcp server: # /etc/init.d/dhcp3-server restart
Add in the /etc/hosts.allow file: tftp in.tftpd : ALL@ALL : ALLOW
Check the NFS configuration:
/etc/hosts.allow : check the line for portmap/nfsd (especially the IP address)
/etc/exports : check if the cdrom share is OK (especially the IP address)
Restart nfs-kernel-server: # /etc/init.d/nfs-kernel-server restart
Now configure the VAIO to boot from the network:
Press F2 on boot to access BIOS
Menu "Advanced"
Network Boot : Enabled
Menu "Boot"
Move the "Network" device up in the list
You will now boot on a Knoppix from the computer where KNOPPIX runs.
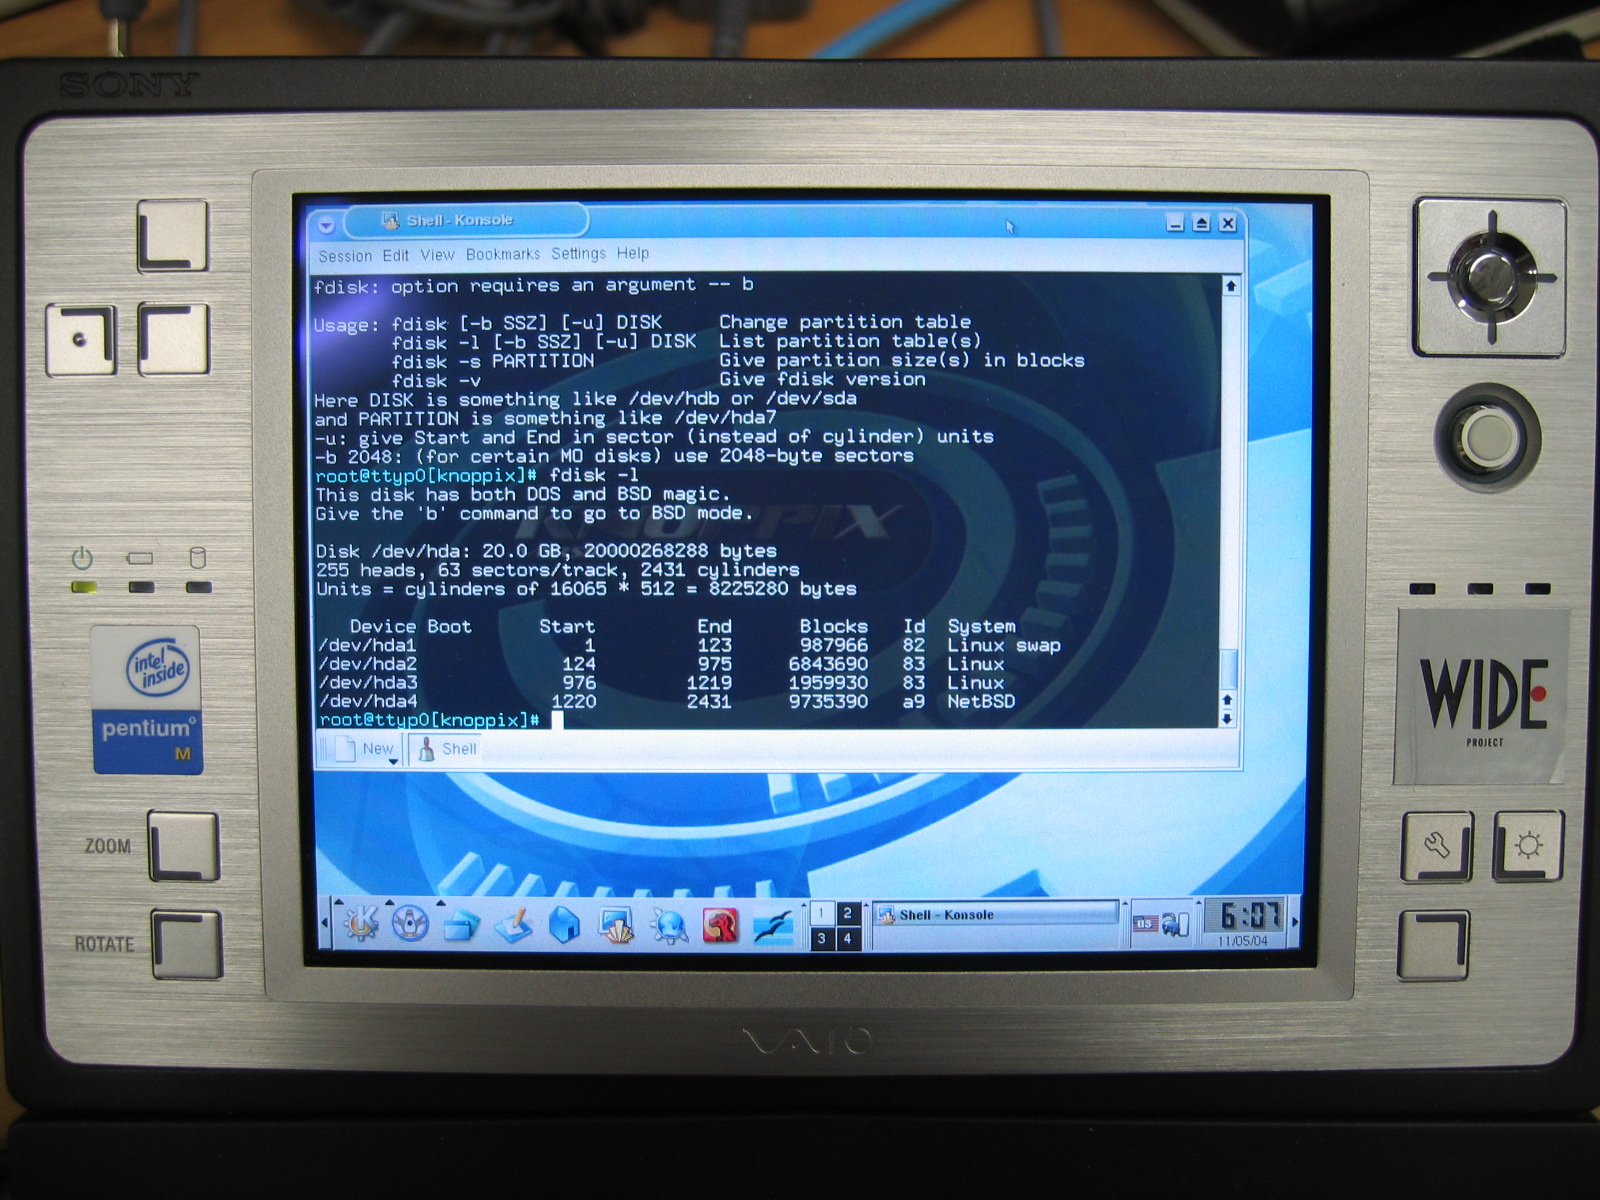
b. Part the disks
Launch a shell on the VAIO and become root. We will now part the disk using
fdisk:
# fdisk /dev/hda
The Hard Drive is 20Go, so we will use 10Go for Linux, 10Go for NetBSD. We wil
l add new partitions for Linux and NetBSD. I used 10Go for Linux (swap 1Go,
/ 7Go, /home 2Go), and 10Go for NetBSD. Here is the exact information:
# fdisk -l
Disk /dev/hda: 20.0 GB, 20000268288 bytes
255 heads, 63 sectors/track, 2431 cylinders
Units = cylinders of 16065 * 512 = 8225280 bytes

Device Boot         Start         End      Blocks   Id  System
/dev/hda1               1         123      987966   82  Linux swap
/dev/hda2             124         975     6843690   83  Linux
/dev/hda3             976        1219     1959930   83  Linux
/dev/hda4            1220        2431     9735390   a9  NetBSD
Now we can start the NetBSD installation (section 3)
or Linux installation (section 4).
Once both system are installed, you will certainly need to configure
NetBSD or Linux bootloader to include both operating systems on startup.
If you cannot boot anymore, you can boot on a Linux rescue floppy, then
type on prompt: rescue root=/dev/hda2 (where /dev/hda2 is
your linux root filesystem "/"). You will then be able to log as root.
Add at the end of your grub config file (/boot/grub/menu.lst):
title NetBSD 1.6.2
rootnoverify (hd0,3,a)
makeactive
chainloader +1
boot
3. Install NetBSD 1.6.2
a. Prepare NetBSD installation
Get NetBSD 1.6.2 floppies from http://www.netbsd.org/mirrors/#ftp
ftp://ftp.jp.netbsd.org/pub/NetBSD/NetBSD-1.6.2/i386/installation/floppy/boot1.fs
ftp://ftp.jp.netbsd.org/pub/NetBSD/NetBSD-1.6.2/i386/installation/floppy/boot2.fs
Format 2 floppies: # fdformat /dev/fd0
Copy each image on a floppy:
# dd of=/dev/fd0 if=boot1.fs
# dd of=/dev/fd0 if=boot2.fs
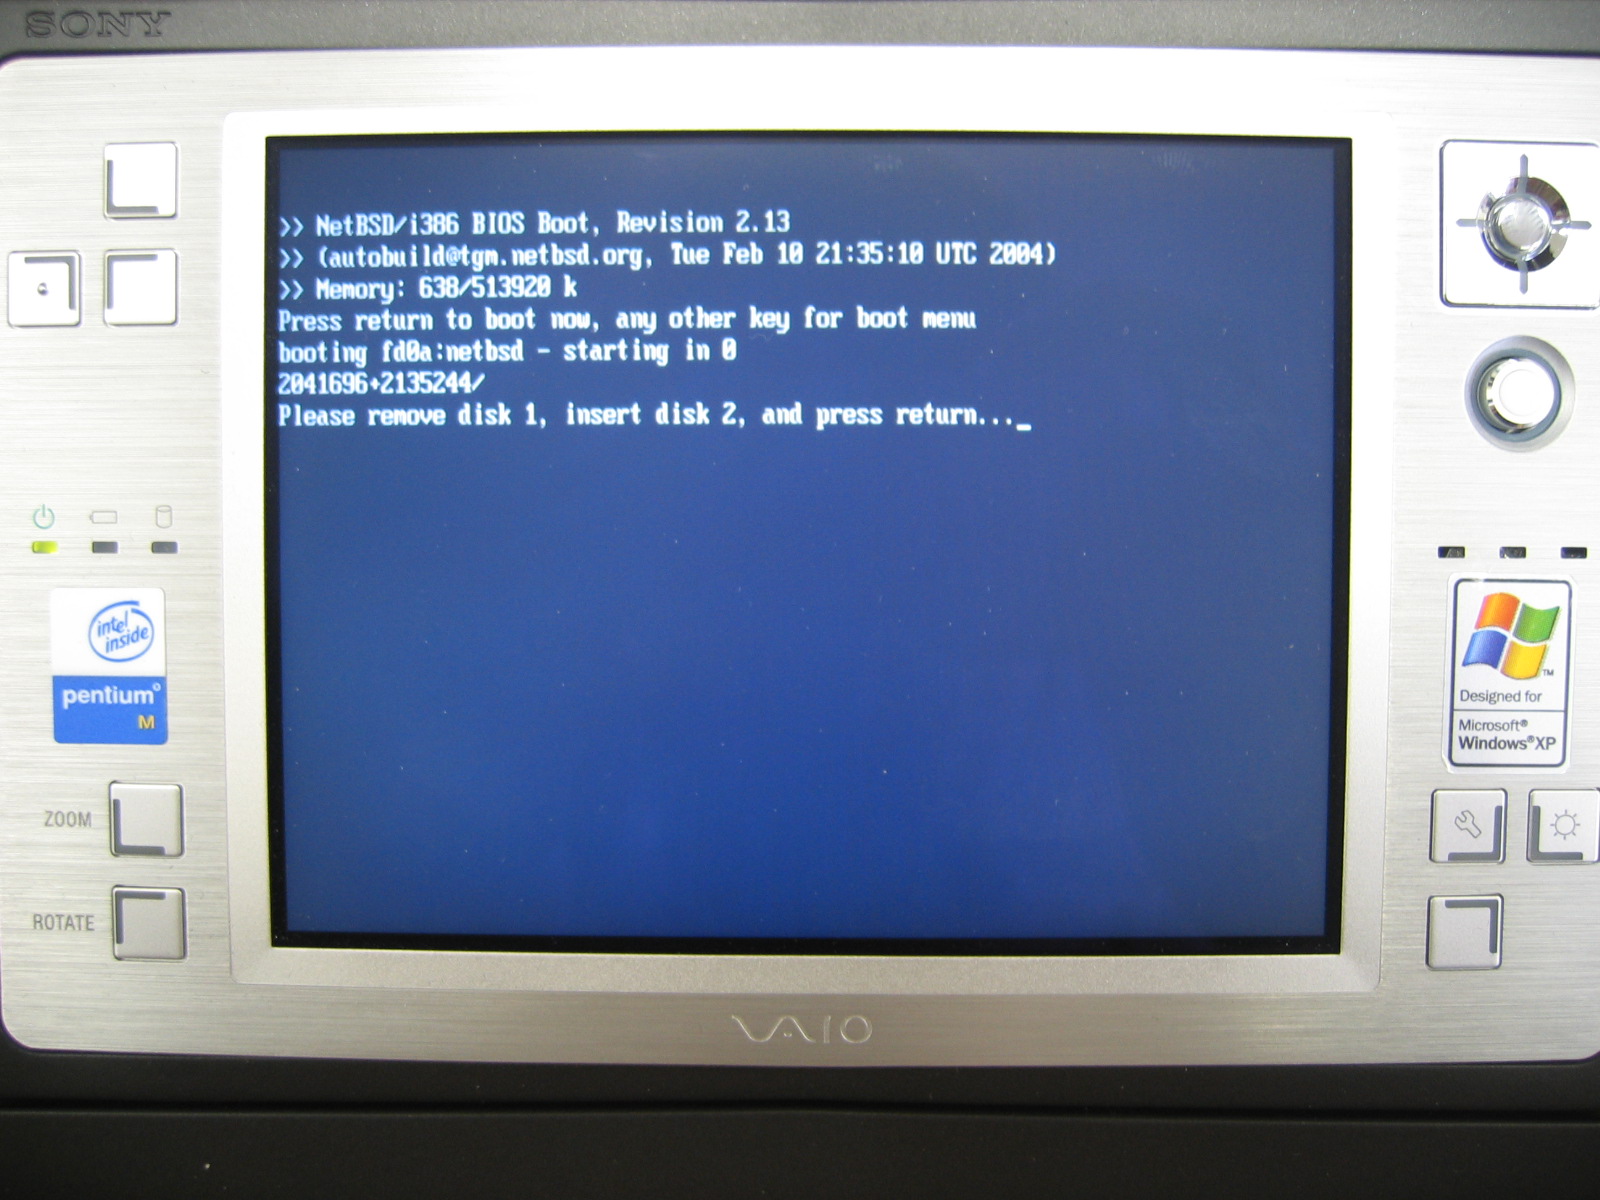
Plug the USB floppy drive in VAIO, reboot the VAIO and boot on floppy disk 1.
b. NetBSD installation
When asked, swap floppy disk 1 with disk 2.
The VAIO USB keyboard does not work with NetBSD, so either you use another
keyboard, or you can perform installation with the stick on the VAIO, thus
only use left/right/up/down and enter... But in this case you need to perform
the operations explained in section 2 to prepare the VAIO hard disk.
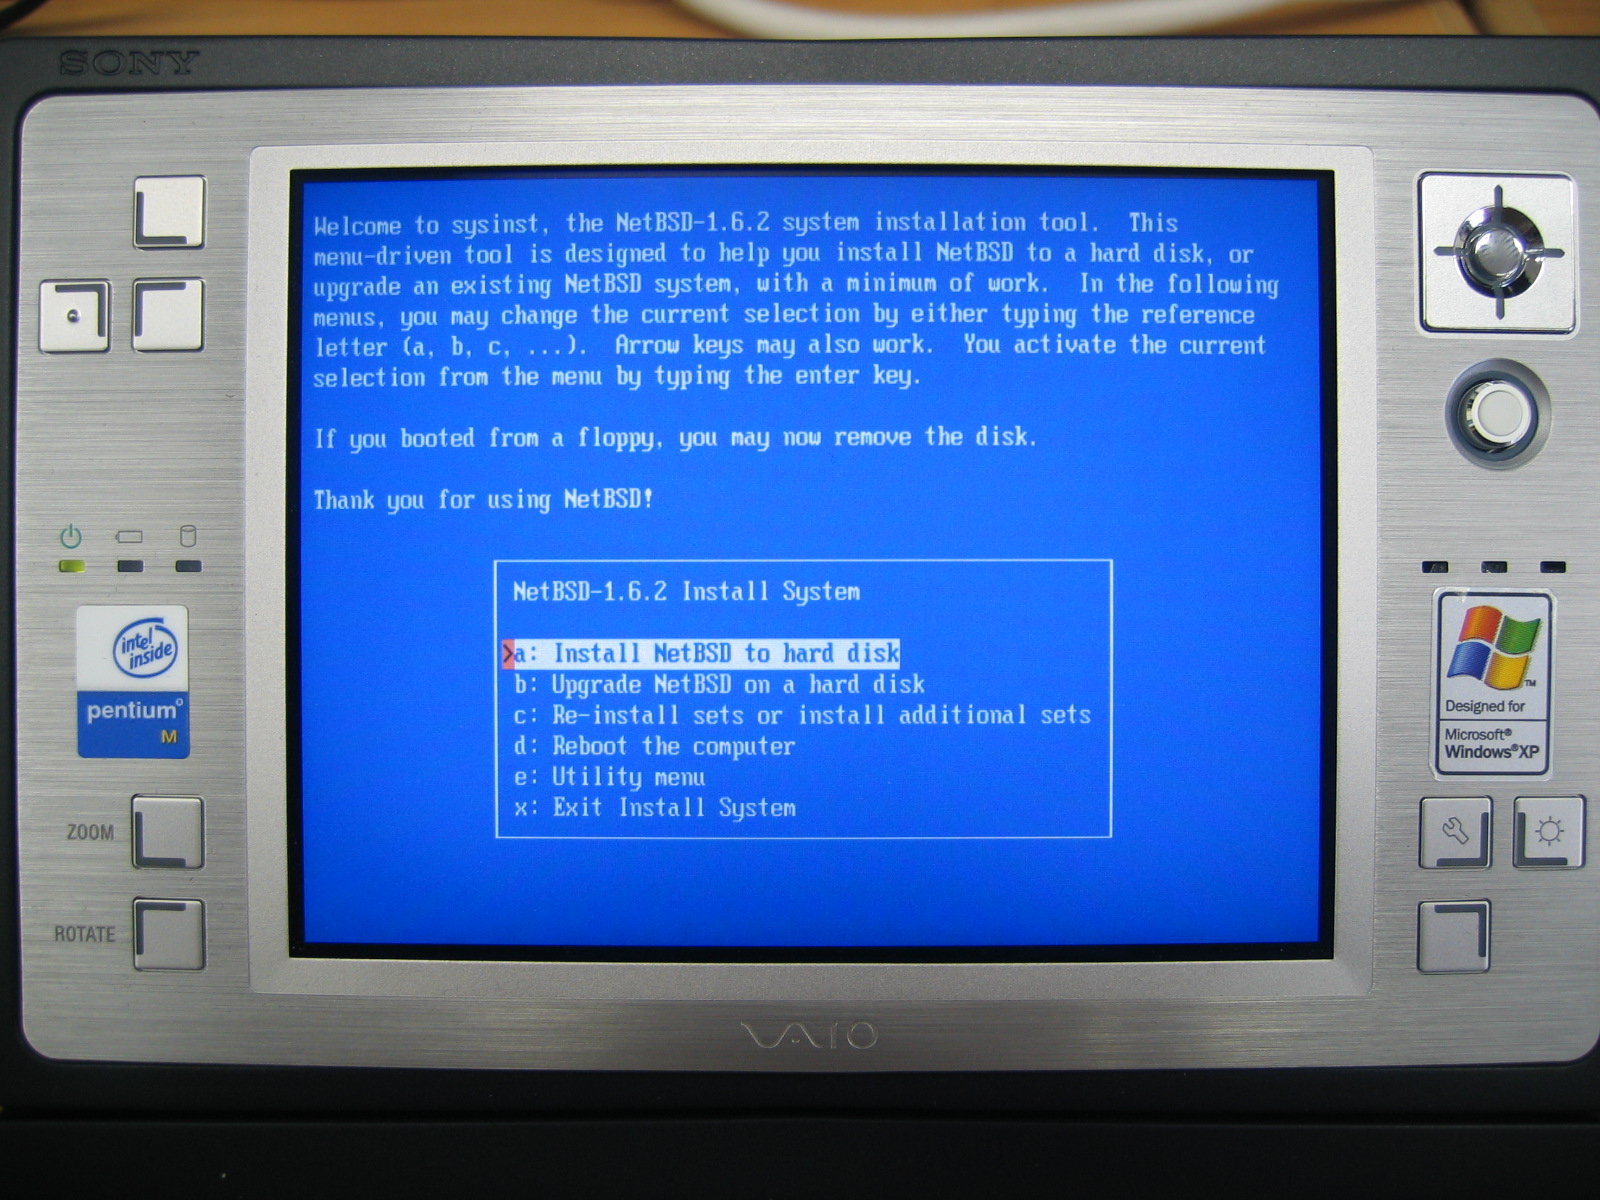
On the first menu choose a. Then choose default values.
When asked, choose to use only part of the disk to install NetBSD. You can
then edit the NetBSD partition and set it active. When it is done, exit the
menu to continue the installation. You can then choose to install bootselector.
You can then choose a Standard installation and select "Partitions are ok".
Choose the default name for the disk. You can then confirm that you want to
process the installation.
You can choose a full installation, via ftp.
Remove floppy, reboot and check if it boots correctly.
From now you will need a keyboard that works! If you don't have one, you may
be able to perform some trick to activate the SSH server in NetBSD (for example
accessing the NetBSD root partition and change some config files, but I advice
you to not use Linux to perform such a trick because writing on UFS filesystem
is still unstable).
c. NetBSD configuration
I advice to modify the toor account to use bash as default shell.
Do not modify the root shell directly, as the bash binary is in
a mounted partition (/usr), it could be a problem if you have issues
with your system.
Install bash:
# ftp ftp.jp.netbsd.org
> cd NetBSD/packages/1.6.2/i386/All
> get bash-2.05.2.7nb1.tgz
> quit
# pkg_add bash-2.05.2.7nb1.tgz
Modify the passwd file with vipw command: copy-paste the "root" line,
change "root" with "toor" and the shell to "/usr/pkg/bin/bash"
You can now log as "toor" instead of "root" (with the same password)
Activate SSH server on startup:
Add the following line in /etc/rc.conf:
shd=YES
Permit root login with adding in /etc/ssh/sshd_config:
PermitRootLogin yes
You can reboot or launch SSH server with /usr/sbin/sshd
Add an user account:
# useradd -s /usr/pkg/bin/bash -d /home/kuntz -m -v kuntz
# passwd kuntz
You can install new packages easily:
Add in .bashrc file:
export PKG_PATH=ftp://ftp.jp.netbsd.org/pub/NetBSD/packages/1.6.2/i386/All
Apply changes:
# source .bashrc
You can now install packages with the following command:
# pkg_add -v package_name
In order to have the japanese keymap on boot, you can add in /etc/rc.local:
wsconsctl -k -w encoding=jp
d. Known issues
If you try to plug/unplug a card in the Compact Flash slot, the VAIO will freeze
(with NetBSD 1.6.2, not tested with another version).
To support the wireless chipset (Atheros), you need at least NetBSD 2.0.
For that purpose you will need to recompile the kernel.
First install several packages that we need for this task:
Some tools for compilation (dependencies will be automatically installed)
# pkg_add -v autoconf213
# pkg_add -v automake14
The kernel sources
# lftp ftp.jp.netbsd.org
> cd pub/NetBSD/NetBSD-2.0/source/sets
> mget syssrc.tgz
> quit
Unpack the tarball in /
# tar xvzpf syssrc.tgz
# cd /sys/arch/i386/conf/
# cp GENERIC_LAPTOP VAIO_U70
Edit the VAIO_U70 file, adjust it according to your needs. Some comments:
You can read http://netbsd.org/Documentation/kernel/ for more informations.
4. Install Debian GNU/Linux
a. Prepare Linux installation
You need another computer to boot from with the VAIO. On this computer, prepare a boot server:
# apt-get install dhcp tftpd-hpa
# mkdir /tftpboot
# cd /tftpboot
I had some issues with the dhcp3-server package (v3.0.3): when the VAIO
tries to get the boot files via tftp, an error message is displayed in the
server's log ("tftp: client does not accept options"). If you meet the same issue,
install the version 3.0.1. The dhcp package should also be safe.
Get the latest package for network installation:
# wget http://http.us.debian.org/debian/dists/unstable/main/installer-i386/current/images/netboot/netboot.tar.gz
Unpack it in the /tftpboot directory:
# tar zxvf netboot.tar.gz
Configure the tftp server:
# vi /etc/inetd.conf
tftp dgram   udp     wait    root  /usr/sbin/in.tftpd -s /tftpboot -r blksize
Configure the dhcp server. Add the following lines. You need the VAIO Mac address:
# vi /etc/dhcpd.conf
host pxeinstall {
hardware ethernet [mac-address of VAIO without brackets];
filename "pxelinux.0";
}
Restart inetd and dhcp server:
# /etc/init.d/inetd restart
# /etc/init.d/dhcp restart
Prepare VAIO for network boot:
Press F2 on boot to access BIOS
Menu "Advanced"
Network Boot : Enabled
Menu "Boot"
Move the "Network" device up in the list
Reboot VAIO, press F12 at boot (VAIO screen) to start network boot.
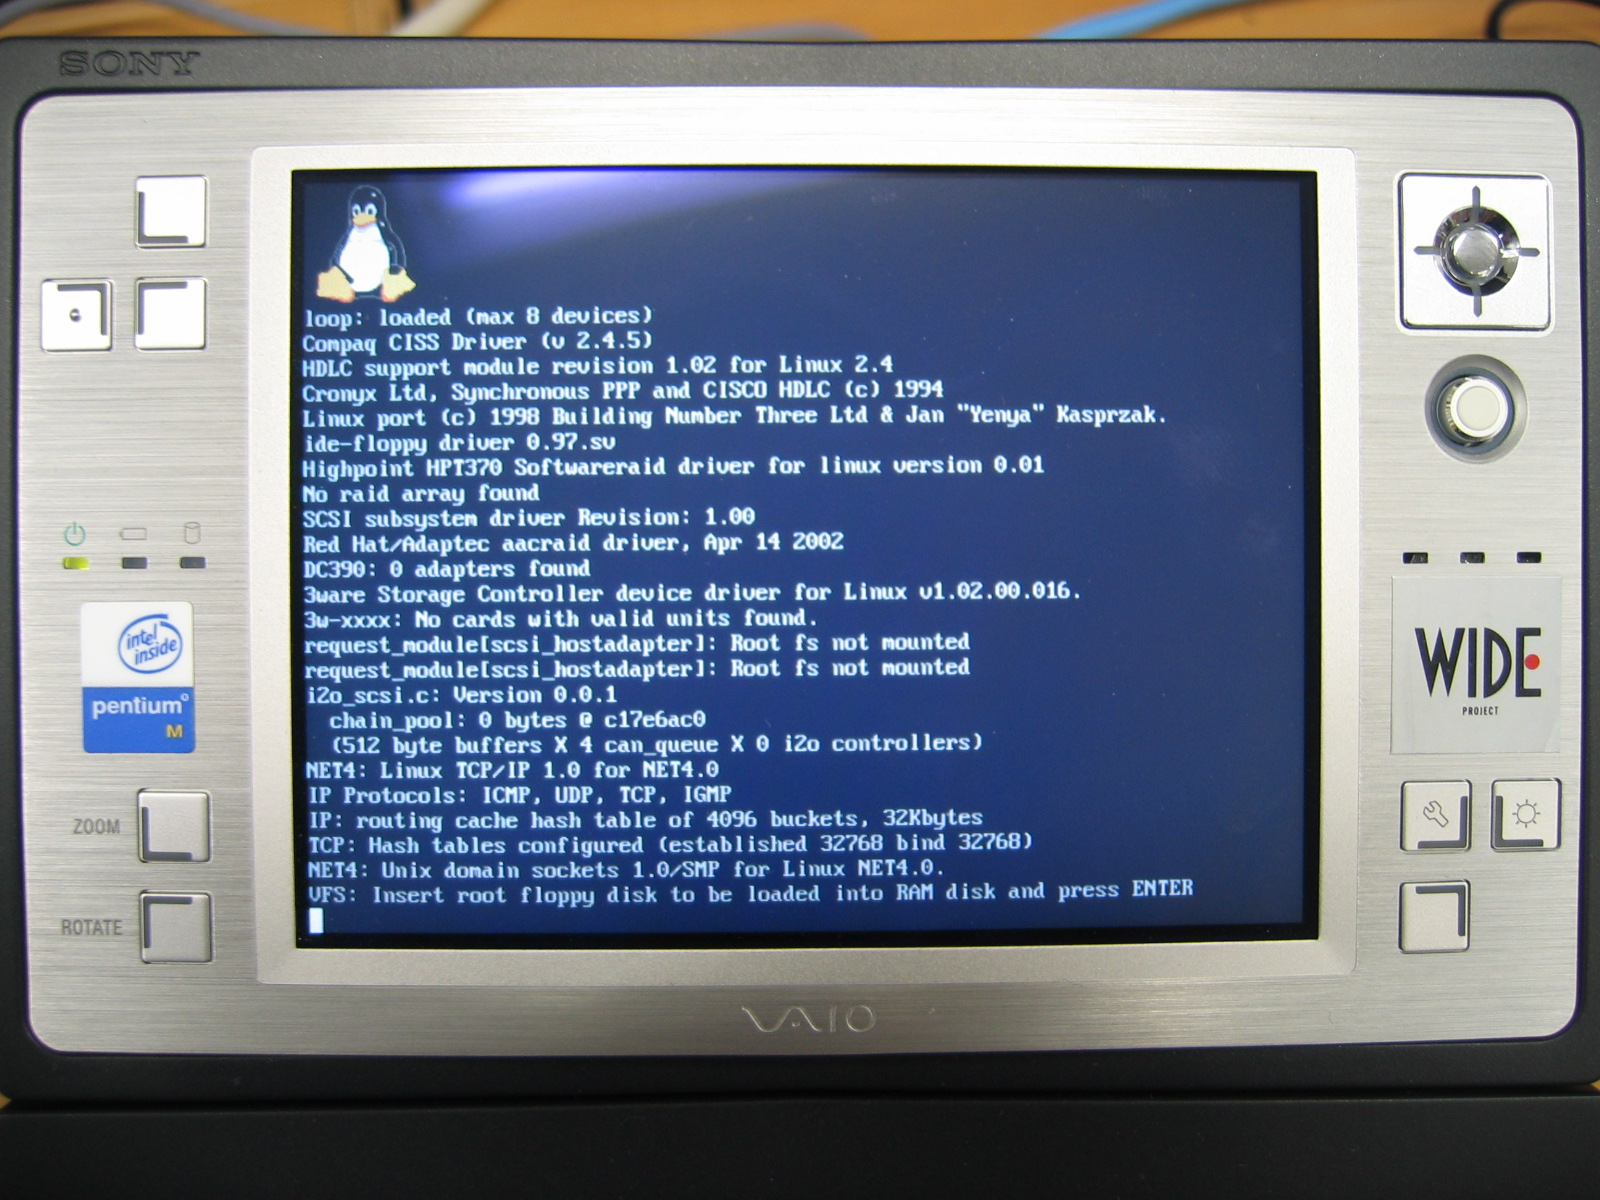
b. Linux installation
Enter linux26 at the prompt.
I experienced some issues with the keyboard during the installation, but it
disapeared on the first reboot after installation is complete.
If you have parted the disk as described in section 2,
you will not have problems, you can perform the installation with the only
up/down/left/right and enter keys.
After the first reboot, the keyboard will work fine, you can then go on the
setup (root password, user account, packages install etc.)
You now have a Debian on your VAIO !
debian:~# uname -a
Linux debian 2.6.8-1-686 #1 Thu Oct 7 03:15:25 EDT 2004 i686 GNU/Linux
c. Tune your Linux
Get here a configuration file for kernel 2.6.10 for the VAIO U70. Sound modules, ACPI, modules needed for touchscreen, frequency scaling features, SONY features etc. are enabled.
To compile a kernel with this configuration file, you have to:
Download the 2.6.10 kernel source
(available from your Linux distribution packages, or from the
kernel.org website). With Debian, you can get them with the apt-get install kernel-source-2.6.10.
The source archive will be located in /usr/src/.
Untar the sources, go in the newly created directory, and execute make menuconfig. You
can select "Load an Alternate Configuration File" at the bottom of the menu.
Type the complete path to the configuration file you have downloaded from this page. Then exit and save from the
configuration menu.
Type make, then make install (as root), then make modules_install (as root).
Do not forget to update your LILO or GRUB configuration.
You can now reboot on your new kernel !
NOTE:
it looks like there are some issues when trying to compile 2.6 kernels
before 2.6.15 when your binutils version is greater than 2.16.
Apply
this kernel patch to your kernel sources and try again.
If you are not confortable with kernel compilation, we invite you to read the following HOWTOs:
How to compile a 2.6 Kernel for Debian
Kernel Build Guide
Some useful packages to install:
modconf - Device Driver Configuration
cvs - Concurrent Versions System
mc - Midnight Commander - a powerful file manager
xvkbd - software virtual keyboard for X11
gok - GNOME Onscreen Keyboard
You can change your OS' hostname:
Write the name of the computer in the /etc/hostname file, then execute:
# hostname -F /etc/hostname
Add the new name in /etc/hosts (on the 127.0.0.1 line)
A reboot is adviced.
Graphics support:
While installing XFree86, when asked you can select i810 as video driver.
X.Org may be installed instead of XFree86. In that case, you can add the following
line in the /etc/X11/xorg.conf file in the i810 section:
Option "PageFlip" "true"
Sound support:
Install the alsa-utils and alsa-base packages and
configure your sound device:
mr-vaio:~# apt-get install alsa-base alsa-utils
mr-vaio:~# alsaconf
The soundcard will be automatically detected (intel8x0)
A reboot helped me to get the sound working.
With alsamixer, unmute "Master M" and "PCM", and mute "Line Jack Sense" and "External", otherwise you will not have any sound.
Wireless Support: (Thanks to http://madwifiwiki.thewebhost.de/wiki/Ath0OnDebian)
Switch on wireless on the right side of the VAIO.
Install the following packages:
mr-vaio:~# apt-get install wireless-tools
mr-vaio:~# apt-get install kernel-headers-2.6.8-1-686
mr-vaio:~# ln -s /usr/src/kernel-headers-2.6.8-1-686/ /usr/src/linux
Create a symbolic link (necessary to build madwifi):
mr-vaio:~/madwifi# ln -s /usr/src/kernel-headers-2.6.8-1-686/ /lib/modules/2.6.8-1-686/build
We will use the madwifi's drivers (http://sourceforge.net/projects/madwifi/). Download the sources from CVS (just hit enter when password is asked):
# cvs -d:pserver:anonymous@cvs.sourceforge.net:/cvsroot/madwifi login
# cvs -z3 -d:pserver:anonymous@cvs.sourceforge.net:/cvsroot/madwifi co madwifi
Build the modules
mr-vaio:~# cd madwifi
mr-vaio:~/madwifi# make
mr-vaio:~/madwifi# make install
Test the module:
mr-vaio:~/madwifi# modprobe ath_pci
You can put "ath_pci" in the /etc/modules file to load the module on boot.
The new interface is called athX (not ethX). You can configure it with ifconfig
mr-vaio:~/madwifi# ifconfig ath0 up
The VAIO chipset is 802.11a/b/g compliant, you may want to force one mode or another :
iwpriv ath0 mode 1              lock operation to 11a only
iwpriv ath0 mode 2              lock operation to 11b only
iwpriv ath0 mode 3              lock operation to 11g only
iwpriv ath0 mode 0              autoselect from 11a/b/g (default)
Sonypi module will allow us to get battery level, change brightness etc.
We will briefly see how we can use it. You can get more informations here: http://popies.net/sonypi/.
First you need to install some packages if not already done:
apt-get install libxtst-dev libx11-dev
Modprobe the module:
mr-vaio:~# modprobe sonypi
Create the device:
mr-vaio:~# mknod /dev/sonypi c 10 63
Install the softwares:
mr-vaio:~# apt-cache search spicctrl
spicctrl - Sony Vaio controller program to set LCD backlight brightness
mr-vaio:~# apt-get install spicctrl
Now you can get all informations with the spicctrl command.
For example the "-p" switch gives you battery informations, the "-B" switch
gives you the current brightness (0-255), the "-b" switch controls the brightness
(255 is black screen):
mr-vaio:~# spicctrl -p
BAT1: 3996/3996 100.00% AC
mr-vaio:~# spicctrl -B
42
mr-vaio:~# spicctrl -b 255
You can add "sonypi" in the /etc/modules file to get it on startup
To be able to use the external display you can install i810switch.
i810switch - Enables/disables video output to CRT/LCD on i810 video hardware
Install the software:
mr-vaio:~# apt-get install i810switch
mr-vaio:~# i810switch -h
Usage: i810switch [crt on/off] [lcd on/off]
crt: enables/disables the output to the CRT display
lcd: enables/disables the output to the LCD
no options: displays the current output status
NOTE: one has reported a problem with i810switch if the
external monitor is not connected when the VAIO is booted.
If the monitor is only connected later, the picture may be
distorded on the external monitor once switching with the
i810switch. This problem can be solved with the following X
options:
Section "Device"
  Identifier      "Intel 82852/855GM"
  Driver          "i810"
  BusID           "PCI:0:2:0"
  Option          "MonitorLayout"   "NONE,LFP+CRT"
EndSection
CompactFLash cards support:
CF memory card: simply mount /dev/hdc1
# mount /dev/hdc1 /mnt
B-mobile card:
Ethernet CF card: recognized as eth2. You can configure it with ifconfig.
New touchpanel support:
Install the evdev driver. On Debian you can install the xserver-xorg-input-evdev package.
If you use the X.org server (instead of XFree), and if its version is 6.9 or higher,
you need to rename the evdev module for the x server:
# mv /usr/X11R6/lib/modules/input/evdev_drv.o /usr/X11R6/lib/modules/input/evdev_drv.so
You need the evdev module (The kernel option is CONFIG_INPUT_EVDEV). Load it:
# modprobe evdev
Create the /dev/input/event4 file:
# mknod /dev/input/event4 c 13 68
Edit the X11 config file (replace XF86Config-4 with xorg.conf if you use the X.org server):
# vi /etc/X11/XF86Config-4

      + Section "InputDevice"
      +        Identifier      "Gunze touchscreen"
      +        Driver          "evdev"
      +        Option          "SendCoreEvents"        "true"
      +        Option          "Device"                "/dev/gunze"
      +        Option          "minx"                  "50"
      +        Option          "maxx"                  "970"
      +        Option          "miny"                  "90"
      +        Option          "maxy"                  "970"
      + EndSection

       Section "serverlayout"
               Identifier      "default layout"
               Screen          "default screen"
               Inputdevice     "generic keyboard"
      +        Inputdevice     "gunze touchscreen"
               InputDevice     "Configured Mouse"
               InputDevice     "Generic Mouse"
       EndSection
You may need to play with the minx/maxx/miny/maxy options to calibrate the touchscreen
Restart the X server. You should be able to enjoy the touchscreen!
Old touchpanel support. It works fine with Fluxbox and KDE, but we experienced some weird behaviour with GNOME using Metacity.
You need to install some packages first:
# apt-get install joystick
You need to be allowed to read the /dev/input/js0 device:
# chmod a+r /dev/input/js0
You can then calibrate the joystick:
# jscal -s 3,1,0,500,514,1207338,1200365,1,0,515,516,1200903,1200124,1,0,0,0,-2147483648,-2147483648 /dev/input/js0
Download this little C code and compile it:
% gcc -o jsmouse jsmouse.c -L/usr/X11R6/lib/ -lX11
Execute it:
% ./jsmouse
You can now touch the sceen to control the mouse. The script is not perfect, so use the new touchpanel support (above) which a lot better!
ACPI Centrino Features: the VAIO U70 comes with a Pentium M 1Ghz, so we can easily control the CPU clock
when ACPI is enabled. We will explain how to do it for 2.6 kernels. For 2.4 kernels, and for more informations,
visit this page.
First, you need some extra modules:
mr-vaio:~# modprobe speedstep_centrino
mr-vaio:~# modprobe cpufreq_userspace
Go to the /sys/devices/system/cpu/cpu0/cpufreq/ directory
You can check the current CPU frequency (in KHz):
mr-vaio:/sys/devices/system/cpu/cpu0/cpufreq# cat cpuinfo_cur_freq
1000000
And many informations as minimum and maximum supported frequencies:
mr-vaio:/sys/devices/system/cpu/cpu0/cpufreq# cat cpuinfo_max_freq
1000000
mr-vaio:/sys/devices/system/cpu/cpu0/cpufreq# cat cpuinfo_min_freq
600000
The available frequencies are:
mr-vaio:/sys/devices/system/cpu/cpu0/cpufreq# cat scaling_available_frequencies
1000000 900000 800000 600000
Then let's change the current frequency from 1Ghz to 600Mhz.
- Current Frequency is:
mr-vaio:/sys/devices/system/cpu/cpu0/cpufreq# cat cpuinfo_cur_freq
1000000
- Then to be able to change the frequency, do the following, a scaling_setspeed
file will appear:
mr-vaio:/sys/devices/system/cpu/cpu0/cpufreq# echo userspace > scaling_governor
- And then we can set the speed to 600 Mhz:
mr-vaio:/sys/devices/system/cpu/cpu0/cpufreq# echo 600000 > scaling_setspeed
- Let's check: CPU frequency is now 600Mhz
mr-vaio:/sys/devices/system/cpu/cpu0/cpufreq# cat cpuinfo_cur_freq
600000
5. Picture Gallery
Click to enlarge pictures.
The VAIO Type U:
NetBSD pictures:
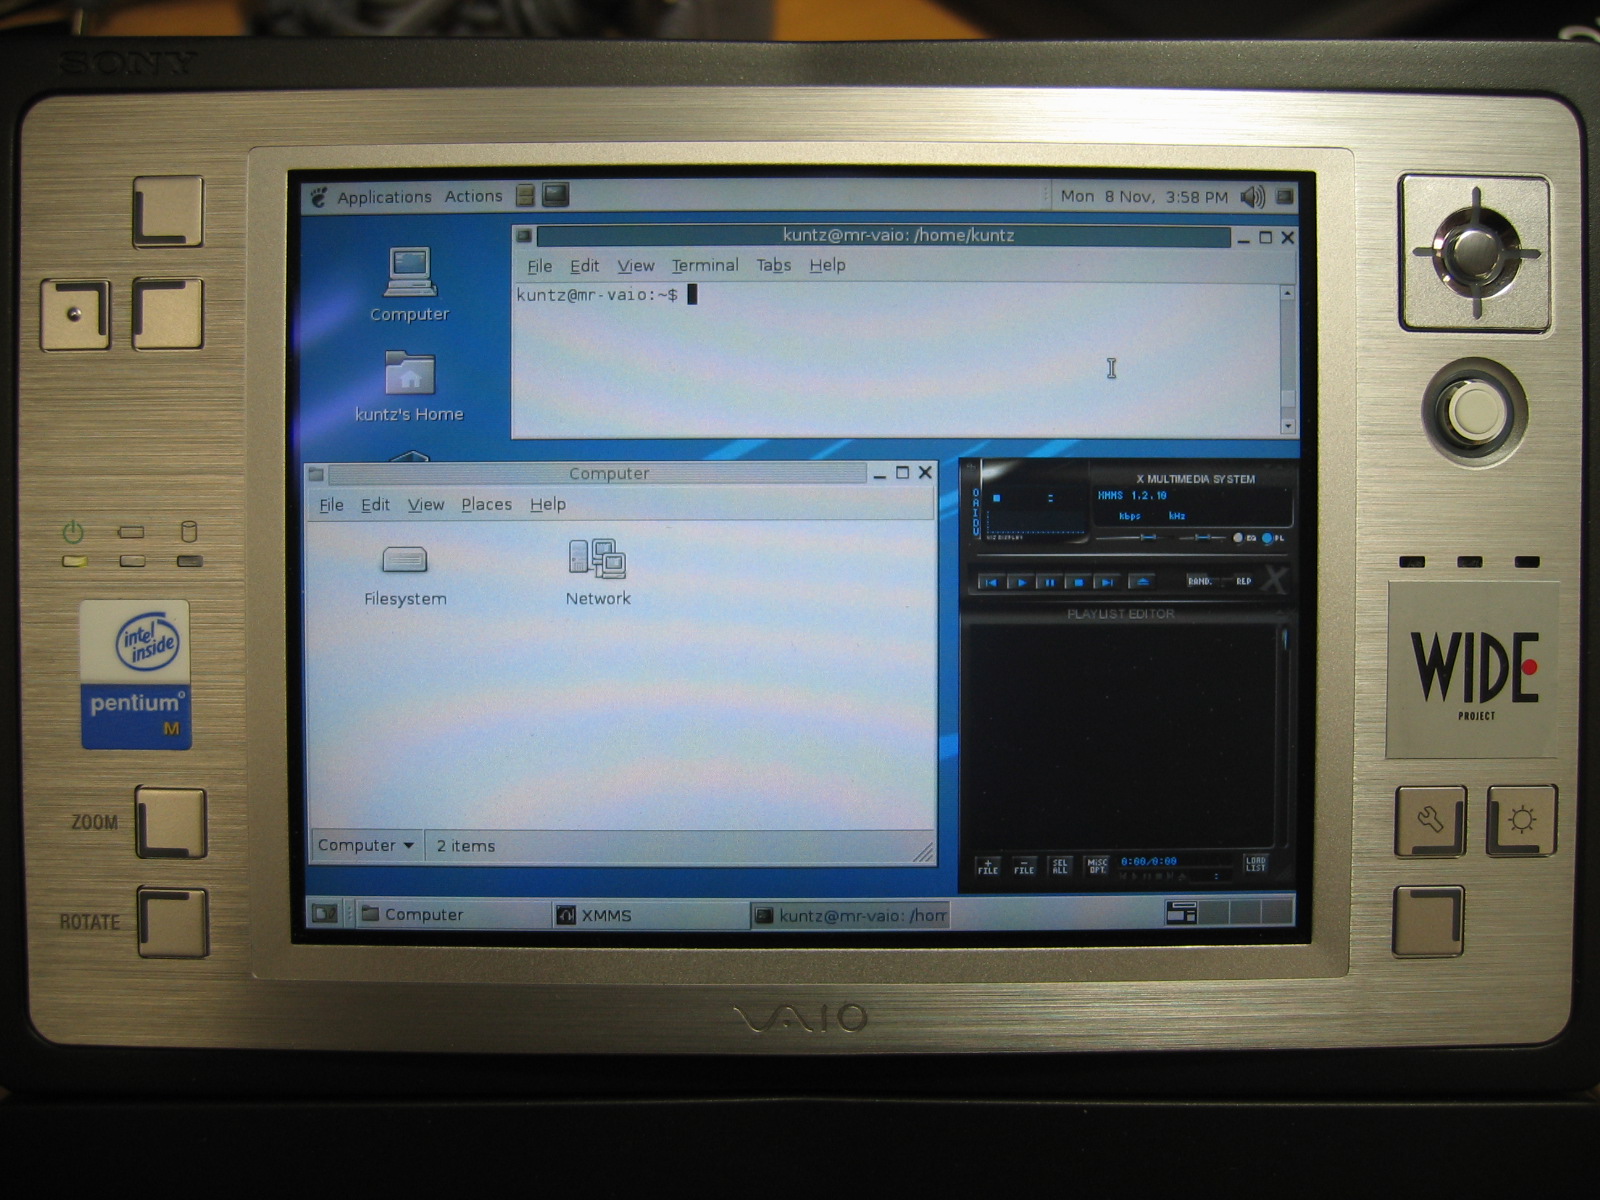
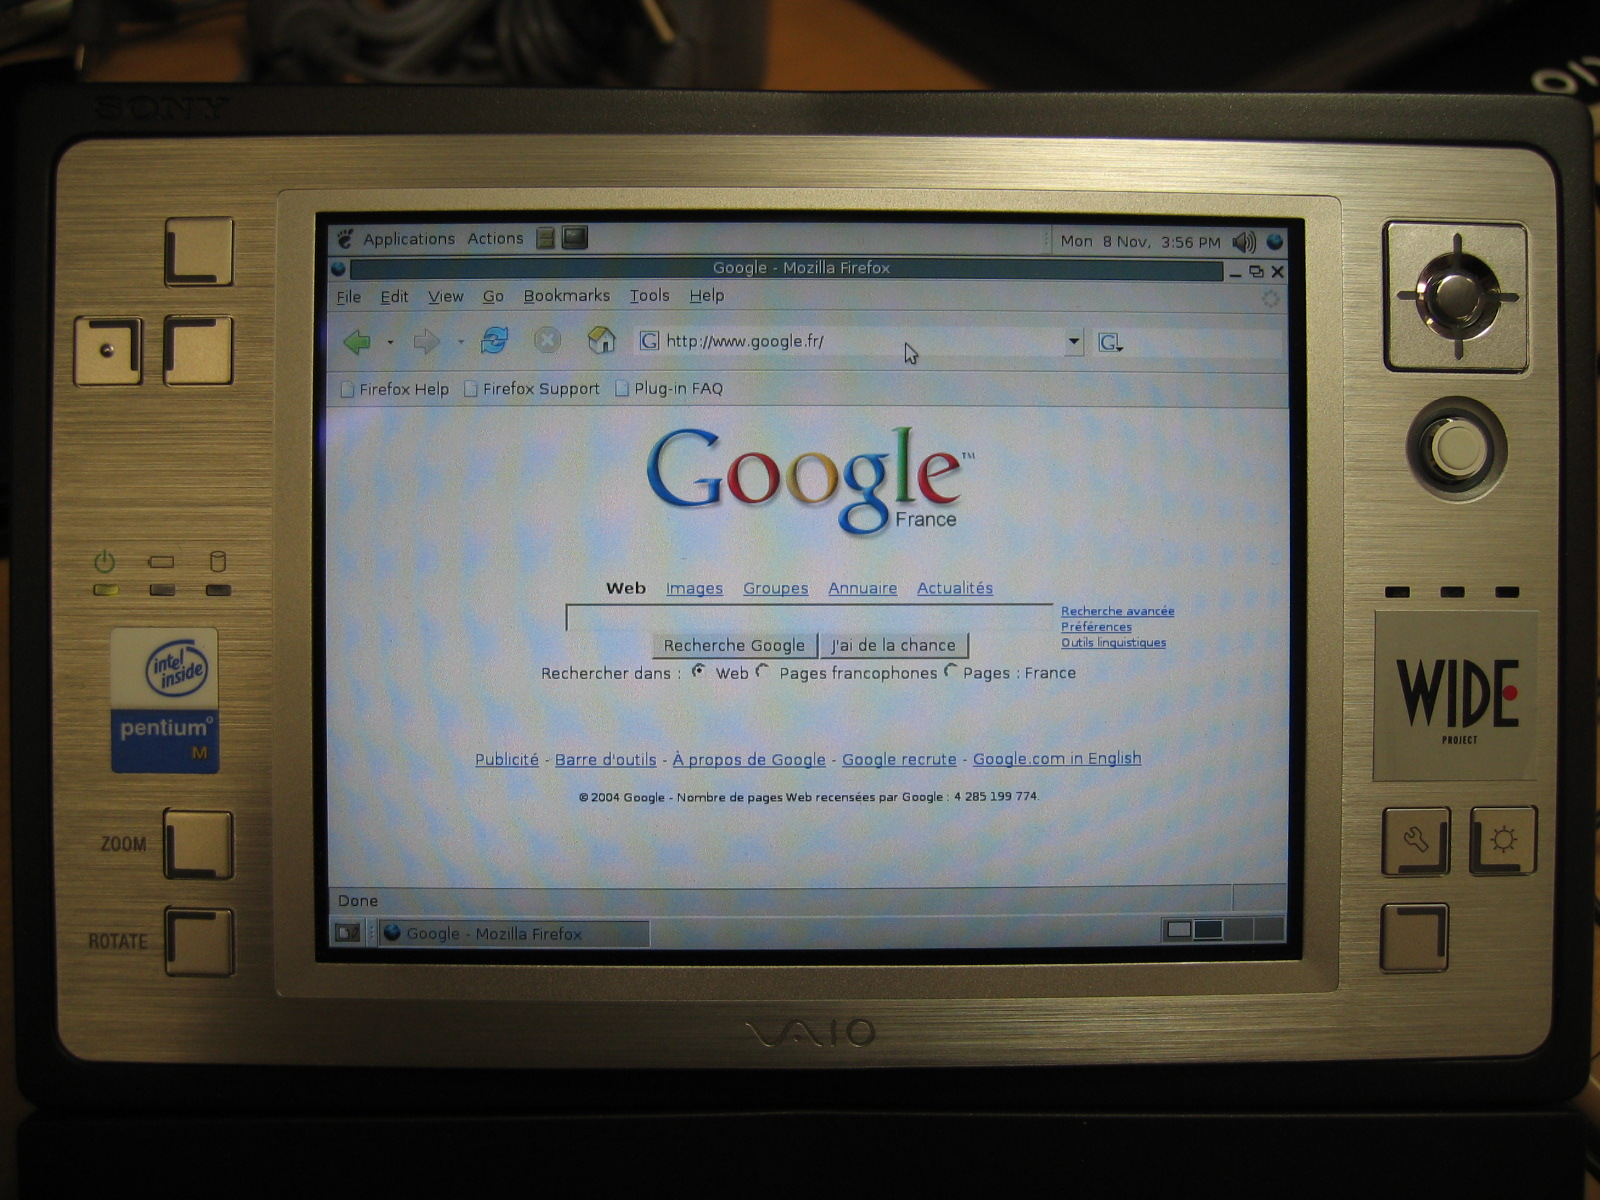
Linux pictures:
References
Linux-Sony homepage
Sony Programmable I/O Control Device Driver
Wireless Chipset support on Linux:
http://sourceforge.net/projects/madwifi/
http://madwifiwiki.thewebhost.de/wiki/Ath0OnDebian
Controlling ACPI centrino features
Some tips for Vaio Type U with Linux Fedora Core2
Some informations about PXE
How to compile a 2.6 Kernel for Debian
Linux Kernel Build Guide
TuxMobil - Linux on laptops, notebooks, PDAs, mobile phones

Acknowledgement
Many thanks to Yoshifumi Nishida for his valuable tips to install Linux on the VAIO, and for providing the jsmouse code; and Martin Andre for his help and improvement on the jsmouse code. Thanks to Ed Halley and Michael Hewner for their feedback on this document.
Contact
Romain KUNTZ
kuntz(at)sfc.wide.ad.jp
Nautilus6 Working Group
Murai Lab. in Keio University, Japan
Created on 2004-12-20
v.1.9 last modified 2006-02-01